
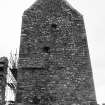
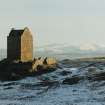
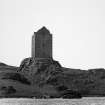
Smailholm Tower


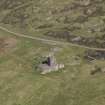
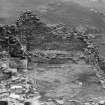
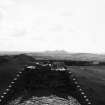
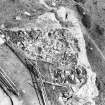
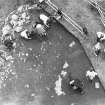
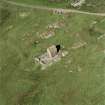
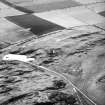
Oblique aerial view centred on the tower-house, taken from the SSW.
View in Canmore
View in Canmore

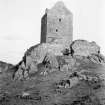
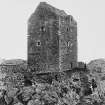
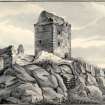
View of Smailholm Tower.
Titled: 'Smailholm Tower. R H Dodd. 1927'.
View in Canmore
View in Canmore

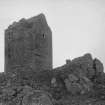
View from NW.
View in Canmore
View in Canmore

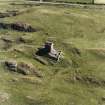
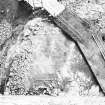
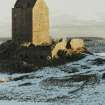
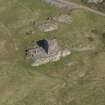
Oblique aerial view centred on the tower house, taken from the NW.
View in Canmore
View in Canmore

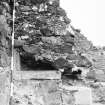
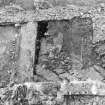
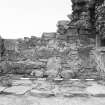
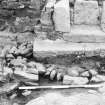
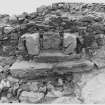
Excavation photograph - fireplace 2 E ingo
View in Canmore
View in Canmore

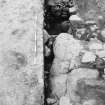
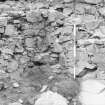
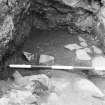
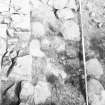
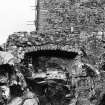
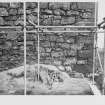
Excavation photograph - fireplace 2 - W ingo showing salt-box
View in Canmore
View in Canmore

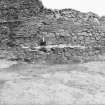
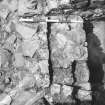
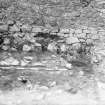
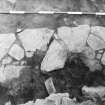
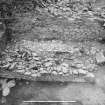
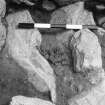
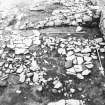
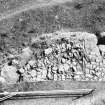
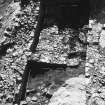
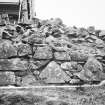
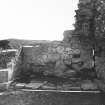
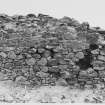
Excavation photograph - wall 7
View in Canmore
View in Canmore

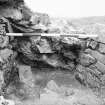
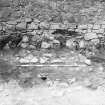
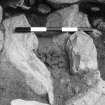
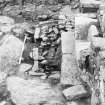
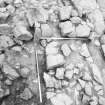
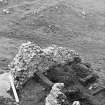
Excavation photograph - recess 35
View in Canmore
View in Canmore

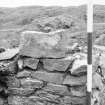
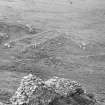
Excavation photograph - Right (E) side of 35
View in Canmore
View in Canmore

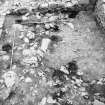
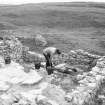
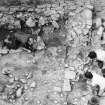
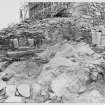
Excavation photograph - N range being excavated
View in Canmore
View in Canmore

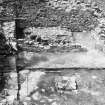
Excavation photograph - blocked window 25 through wall 1
View in Canmore
View in Canmore

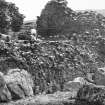
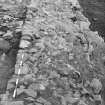
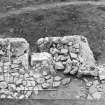
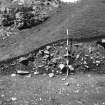
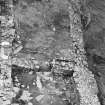
Excavation photograph - N barmkin wall from NE
View in Canmore
View in Canmore

Excavation photograph - planning in Room II
View in Canmore
View in Canmore

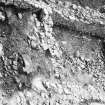
Excavation photograph - Section N/S through floor make-up in Room I
View in Canmore
View in Canmore

Excavation photograph - Room I
View in Canmore
View in Canmore

Excavation photograph - fireplace 12 in Room V
View in Canmore
View in Canmore

Excavation photograph - fireplace 12 in Room V
View in Canmore
View in Canmore

Excavation photograph - SE corner in Room II
View in Canmore
View in Canmore

Excavation photograph - fireplace 12 in Room V - from above
View in Canmore
View in Canmore

Excavation photograph - S barmkin wall - from W
View in Canmore
View in Canmore

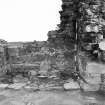
Excavation photograph - Rooms I, II and III - from E later levels
View in Canmore
View in Canmore

Excavation photograph - Rooms I, II and III - later levels
View in Canmore
View in Canmore

Excavation photograph - Rooms I, II and III - from W - later levels
View in Canmore
View in Canmore

Excavation photograph - Rooms I, II and III - from W - later levels
View in Canmore
View in Canmore

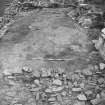
Excavation photograph - Room III - floor 55 in situ
View in Canmore
View in Canmore

Excavation photograph - Room I - from S
View in Canmore
View in Canmore

Excavation photograph - Doorway through wall 7 - from W
View in Canmore
View in Canmore

Excavation photograph - fireplace 2 - showing salt-box, fire back and hearth stones
View in Canmore
View in Canmore

Excavation photograph - E face of wall 4 at Junction with N barmkin wall
View in Canmore
View in Canmore

Excavation photograph - W face of E barmkin wall in Room II
View in Canmore
View in Canmore

Excavation photograph - fireplace 2 in Room I
View in Canmore
View in Canmore

Excavation photograph - chain 22 in Room II
View in Canmore
View in Canmore

Excavation photograph - chain 22 in Room II
View in Canmore
View in Canmore

Excavation photograph - recess 35 in Room III
View in Canmore
View in Canmore

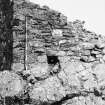
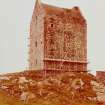
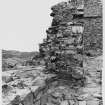
Excavation photograph - W face of tower-house
View in Canmore
View in Canmore

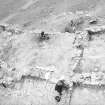
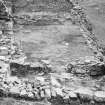
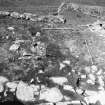
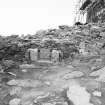
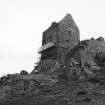
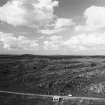
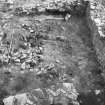
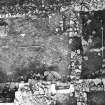
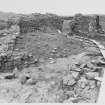
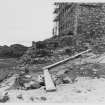
Excavation photograph - The site from the NW
View in Canmore
View in Canmore

Excavation photograph - fireplace 21 in Room II
View in Canmore
View in Canmore

Excavation photograph - fireplace 21 in Room II
View in Canmore
View in Canmore

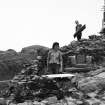
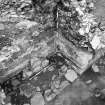
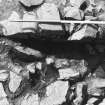
Excavation photograph - drain 36 in S barmkin wall
View in Canmore
View in Canmore

Excavation photograph - Rooms I and III
View in Canmore
View in Canmore

Excavation photograph - fireplace 18 in Room I from E
View in Canmore
View in Canmore

Excavation photograph - fireplace 18 in Room I from E
View in Canmore
View in Canmore

Excavation photograph - views from tower-house
View in Canmore
View in Canmore

Excavation photograph - views from tower-house
View in Canmore
View in Canmore

Excavation photograph - Room V from W showing 31 and T-shaped feature 39
View in Canmore
View in Canmore

Excavation photograph - Oblique of Room V after removal of 12, 31 and 39 showing intermediate floor level
View in Canmore
View in Canmore

Excavation photograph - staff, and view from scaffolding
View in Canmore
View in Canmore

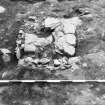
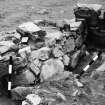
Excavation photograph - East courtyard showing remnants of South Barmkin wall
View in Canmore
View in Canmore

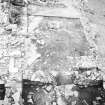
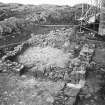
Excavation photograph - East Courtyard after removal of topsoil
View in Canmore
View in Canmore

Excavation photograph -
View in Canmore
View in Canmore

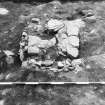
Excavation photograph - Room VI from S showing fireback of 23 and metalling 85
View in Canmore
View in Canmore

Excavation photograph - East Courtyard removal of topsoil from N showing S Barmkin wall
View in Canmore
View in Canmore

Excavation photograph - Room V "G.L. Good's excavation for the day]"
View in Canmore
View in Canmore

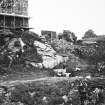
Excavation photograph - South area dog leg in barmkin
View in Canmore
View in Canmore

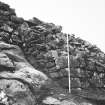
Excavation photograph - Vaulting on S barmkin wall (note kestrel droppings) from S
View in Canmore
View in Canmore

Excavation photograph - E courtyard
View in Canmore
View in Canmore

Excavation photograph - Room V and VI primary floor levels
View in Canmore
View in Canmore

Excavation photograph - ?
View in Canmore
View in Canmore

Excavation photograph -
View in Canmore
View in Canmore

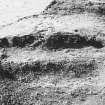
Excavation photograph - section through earthwork SE of tower
View in Canmore
View in Canmore

Excavation photograph
View in Canmore
View in Canmore

Excavation photograph
View in Canmore
View in Canmore

Excavation photograph
View in Canmore
View in Canmore

Excavation photograph
View in Canmore
View in Canmore

Excavation photograph
View in Canmore
View in Canmore

Excavation photograph
View in Canmore
View in Canmore

Excavation photograph
View in Canmore
View in Canmore

Excavation photograph
View in Canmore
View in Canmore

Excavation photograph
View in Canmore
View in Canmore

Excavation photograph
View in Canmore
View in Canmore

Excavation photograph
View in Canmore
View in Canmore

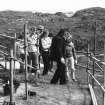
Excavation photograph - Press day
View in Canmore
View in Canmore

Excavation photograph - Rooms I and II - from E
View in Canmore
View in Canmore

Excavation photograph - Rooms I and III
View in Canmore
View in Canmore

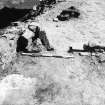
Excavation photograph - staff at work - from above
View in Canmore
View in Canmore

Smailholm Tower Small Finds
View in Canmore
View in Canmore

Smailholm Tower Small Finds
View in Canmore
View in Canmore

Smailholm Tower Small Finds 16.10.80
View in Canmore
View in Canmore

Smailholm Tower
View in Canmore
View in Canmore

Smailholm Tower
View in Canmore
View in Canmore

Smailholm Tower
View in Canmore
View in Canmore

Smailholm Tower
View in Canmore
View in Canmore

Smailholm Tower
View in Canmore
View in Canmore

Smailholm Tower
View in Canmore
View in Canmore

Smailholm Tower
View in Canmore
View in Canmore

Smailholm Tower
View in Canmore
View in Canmore

Smailholm Tower
View in Canmore
View in Canmore

Smailholm Tower
View in Canmore
View in Canmore

Smailholm Tower
View in Canmore
View in Canmore

Smailholm Tower
View in Canmore
View in Canmore

Smailholm Tower
View in Canmore
View in Canmore

Smailholm Tower
View in Canmore
View in Canmore

Smailholm Tower
View in Canmore
View in Canmore

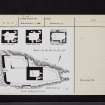
Smailholm Tower, NT63SW 2, Ordnance Survey index card, page number 3, Recto
View in Canmore
View in Canmore

General view.
View in Canmore
View in Canmore

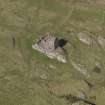
Oblique aerial view centred on the tower house, taken from the SW.
View in Canmore
View in Canmore

Oblique aerial view centred on the tower-house, taken from the S.
View in Canmore
View in Canmore

Oblique aerial view centred on the tower-house, taken from the ESE.
View in Canmore
View in Canmore

Perspective view of Smailholm Tower.
View in Canmore
View in Canmore

Oblique aerial view.
View in Canmore
View in Canmore


You may copy, display, store and make derivative works for personal use or use solely within an educational institution by staff and students, under these conditions: the ScotlandsPlaces website is attributed, there is no commercial use or sale, and no public distribution (for example, by hand, email, or web). Full licence details.
Details
Organisation: Historic Environment Scotland (HES)
Alternative name(s): Smailholm Tower And Barmkin; Lady Hill; Sandyknowe Tower
Canmore ID: 57231
Site type: Barmkin (medieval), Tower House (medieval)
County: Roxburghshire
Parish: Smailholm
Council: Scottish Borders, The