
North Queensferry, Forth Defences, Inner, Carlingnose Battery


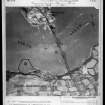
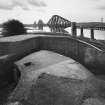
Vertical aerial photograph taken by the Luftwaffe in October 1939 of North and South Queensferry and the Forth Railway Bridge.
View in Canmore
View in Canmore

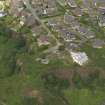
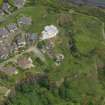
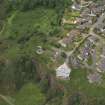
Oblique aerial view centred on the coast battery, taken from the SE.
View in Canmore
View in Canmore

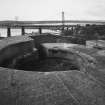
View from NE of south emplacement
View in Canmore
View in Canmore

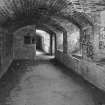
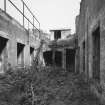
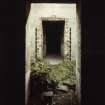
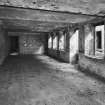
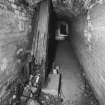
View from NE of SE portion of undercroft.
View in Canmore
View in Canmore

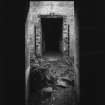
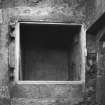
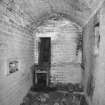
Detail of shell store.
View in Canmore
View in Canmore

Oblique aerial view centred on the coast battery, taken from the SW.
View in Canmore
View in Canmore

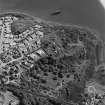
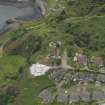
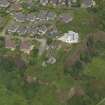
Oblique aerial view of Carlingnose point centred on the remains of a battery and submarine mining station, taken from the WSW.
View in Canmore
View in Canmore

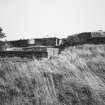
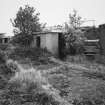
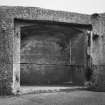
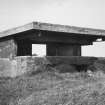
View from W of bunkers.
View in Canmore
View in Canmore

View from NE of bunkers.
View in Canmore
View in Canmore

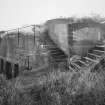
View from SE of north emplacement
View in Canmore
View in Canmore

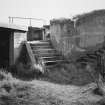
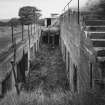
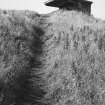
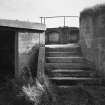
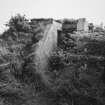
View from W of access steps to bunkers.
View in Canmore
View in Canmore

View from SSW of open lower level of bunkers.
View in Canmore
View in Canmore

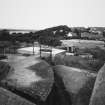
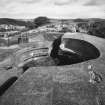
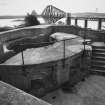
View from N of south emplacement.
View in Canmore
View in Canmore

View from S of south emplacement.
View in Canmore
View in Canmore

North Queensferry, Forth Defences, Inner, Carlingnose Battery, NT18SW 105, Ordnance Survey index card, Recto
View in Canmore
View in Canmore

View from SW of bunkers.
View in Canmore
View in Canmore

View from SSW of open lower level of bunkers.
View in Canmore
View in Canmore

View from N of south emplacement.
View in Canmore
View in Canmore

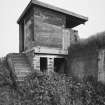
View from NE of lookout/ranging post.
View in Canmore
View in Canmore

View from NW of interior of lookout/ranging post.
View in Canmore
View in Canmore

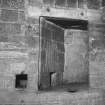
Detail of storage cupboard of S emplacement.
View in Canmore
View in Canmore

Oblique aerial view centred on the coast battery, taken from the NE.
View in Canmore
View in Canmore

Detail of access steps to bunkers.
View in Canmore
View in Canmore

View from SW of lookout/ranging post.
View in Canmore
View in Canmore

Detail of shell store.
View in Canmore
View in Canmore

View from SSW of bunkers.
View in Canmore
View in Canmore

View from SW of SW portion of undercroft showing jack-arched roof.
View in Canmore
View in Canmore

View from NE of NE portion of undercroft.
View in Canmore
View in Canmore

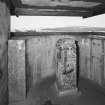
Detail of specimen niche in SE portion of undercroft.
View in Canmore
View in Canmore

Detail of shell conveyor opening of S emplacement.
View in Canmore
View in Canmore

Oblique aerial view centred on the coast battery, taken from the E.
View in Canmore
View in Canmore

View from SE of lookout/ranging post
View in Canmore
View in Canmore

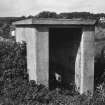
Detail of secondary blockhouse to NE
View in Canmore
View in Canmore

Oblique aerial view centred on the coast battery, taken from the SSW.
View in Canmore
View in Canmore

Detail of sentry box.
View in Canmore
View in Canmore

Detail of shell conveyor of N emplacement.
View in Canmore
View in Canmore

detail of shell conveyor of S emplacement.
View in Canmore
View in Canmore


You may copy, display, store and make derivative works for personal use or use solely within an educational institution by staff and students, under these conditions: the ScotlandsPlaces website is attributed, there is no commercial use or sale, and no public distribution (for example, by hand, email, or web). Full licence details.
Details
Organisation: Historic Environment Scotland (HES)
Alternative name(s): Forth Defences; Carlingnose Barracks
Canmore ID: 50908
Site type: Coastal Battery (first World War), Coastal Battery (20th Century)
County: Fife
Parish: Inverkeithing
Council: Fife