
Macmerry Airfield


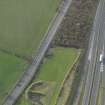
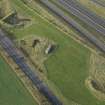
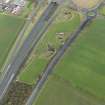
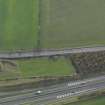
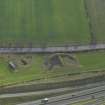
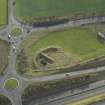
Oblique aerial view centred on the dispersal bay (e pen) with a pillbox adjacent, taken from the E.
View in Canmore
View in Canmore

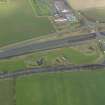
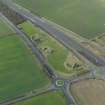
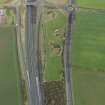
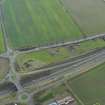
General oblique aerial view centred on the dispersal bays (e pens) with a pillbox adjacent, taken from the S.
View in Canmore
View in Canmore

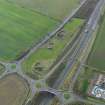
General oblique aerial view centred on the dispersal bays (e pens) with a pillbox adjacent, taken from the NE.
View in Canmore
View in Canmore

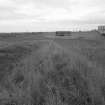
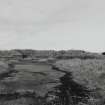
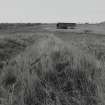
View E from dispersal bay to airfield perimeter building.
View in Canmore
View in Canmore

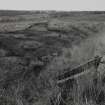
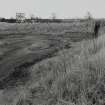
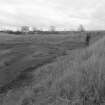
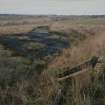
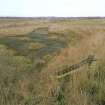
View S showing protected dispersal bay and air-raid shelters built into the rear bank.
View in Canmore
View in Canmore

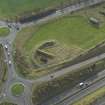
Oblique aerial view centred on the dispersal bay (e pen), taken from the NE.
View in Canmore
View in Canmore

General oblique aerial view centred on the dispersal bays (e pens) with a pillbox adjacent, taken from the E.
View in Canmore
View in Canmore

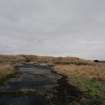
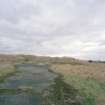
View NE from dispersal bay showing concrete apron below.
View in Canmore
View in Canmore

View NE showing concrete apron and air-raid shelter.
View in Canmore
View in Canmore

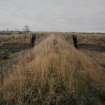
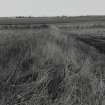
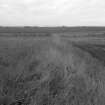
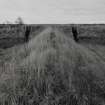
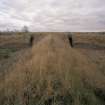
View N looking along the earth and brick bank which divides the bay.
View in Canmore
View in Canmore

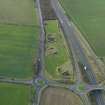
Oblique aerial view centred on the dispersal bays (e pens), taken from the SE.
View in Canmore
View in Canmore

General oblique aerial view centred on the dispersal bays (e pens) with a pillbox adjacent, taken from the ENE.
View in Canmore
View in Canmore

General oblique aerial view centred on the dispersal bays (e pens) with a pillbox adjacent, taken from the SW.
View in Canmore
View in Canmore

General oblique aerial view centred on the dispersal bays (e pens) with a pillbox adjacent, taken from the ENE.
View in Canmore
View in Canmore

View N looking along the earth and brick bank which divides the bay.
View in Canmore
View in Canmore

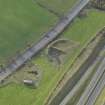
Oblique aerial view centred on the dispersal bay (e pen) with a pillbox adjacent, taken from the NE.
View in Canmore
View in Canmore

Oblique aerial view centred on the dispersal bay (e pen) with a pillbox adjacent, taken from the N.
View in Canmore
View in Canmore

General oblique aerial view centred on the dispersal bays (e pens) with a pillbox adjacent, taken from the NNE.
View in Canmore
View in Canmore

View S showing entrance to air-raid shelter.
View in Canmore
View in Canmore

View NE from the extremity of the concrete apron looking to the air-raid shelters in the main arc.
View in Canmore
View in Canmore

Oblique aerial view centred on the dispersal bay (e pen) with a pillbox adjacent, taken from the N.
View in Canmore
View in Canmore

View E from dispersal bay to airfield perimeter building.
View in Canmore
View in Canmore

General oblique aerial view centred on the dispersal bays (e pens) with a pillbox adjacent, taken from the SE.
View in Canmore
View in Canmore

View S showing entrance to air-raid shelter.
View in Canmore
View in Canmore

View NE from the extremity of the concrete apron looking to the air-raid shelters in the main arc.
View in Canmore
View in Canmore

View NE showing air-raid shelters at rear of dispersal bay.
View in Canmore
View in Canmore

View S, looking back along the dividing bank with the air-raid shelters in the background.
View in Canmore
View in Canmore

Oblique aerial view centred on the dispersal bay (e pen), taken from the NE.
View in Canmore
View in Canmore

View NE showing air-raid shelters at rear of dispersal bay.
View in Canmore
View in Canmore

View S showing protected dispersal bay and air-raid shelters built into the rear bank.
View in Canmore
View in Canmore

You may copy, display, store and make derivative works for personal use or use solely within an educational institution by staff and students, under these conditions: the ScotlandsPlaces website is attributed, there is no commercial use or sale, and no public distribution (for example, by hand, email, or web). Full licence details.
Details
Organisation: Historic Environment Scotland (HES)
Alternative name(s):
Canmore ID: 255578
Site type: Building (period Unassigned), Dispersal Bay(s) (20th Century)
County: East Lothian
Parish: Gladsmuir
Council: East Lothian