
Clyde Defences, Portkil Battery


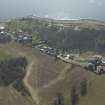
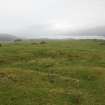
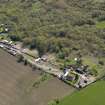
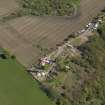
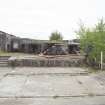
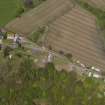
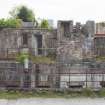
Oblique aerial view of Portkil Coastal Battery, looking S.
View in Canmore
View in Canmore

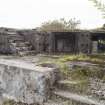
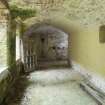
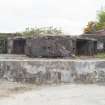
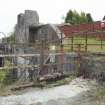
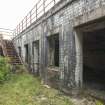
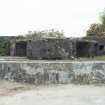
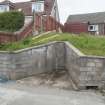
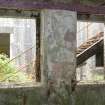
No.2, 6-inch gun emplacement. South east platform. View from NW.
View in Canmore
View in Canmore

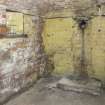
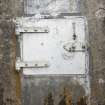
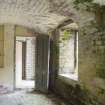
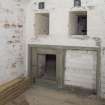
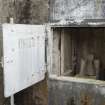
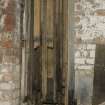
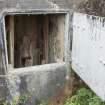
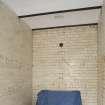
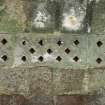
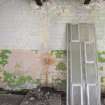
Interior of NW shell store. Detail of window.
View in Canmore
View in Canmore

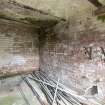
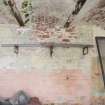
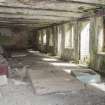
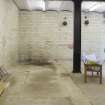
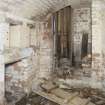
Interior of magazine.
View in Canmore
View in Canmore

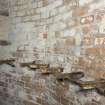
Interior of Royal Artillery store. detail of backets on SW wall.
View in Canmore
View in Canmore

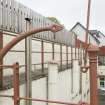
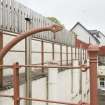
4.7in gun battery. Detail of railings.
View in Canmore
View in Canmore

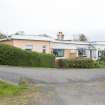
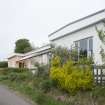
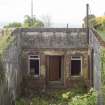
Caretakers quarters. General view from W.
View in Canmore
View in Canmore

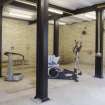
Engine House, engine room, Interior.
View in Canmore
View in Canmore

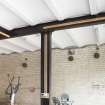
Engine House, engine room, interior. Detail of roof support structure.
View in Canmore
View in Canmore

6-inch gun battery, interior of SE shell store. Detail of bricked up shell hoist and angled light recess.
View in Canmore
View in Canmore

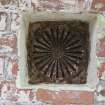
6-inch gun battery, interior of SE shell store. Detail of ceiling vent.
View in Canmore
View in Canmore

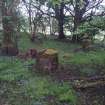
General view of accomodation camp concrete pillars
View in Canmore
View in Canmore

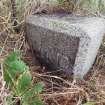
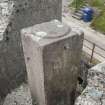
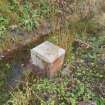
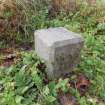
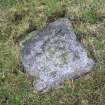
Boundary stone No. 6
View in Canmore
View in Canmore

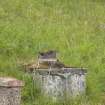
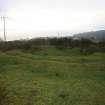
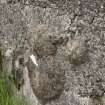
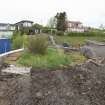
Hollow of possible building platform
View in Canmore
View in Canmore

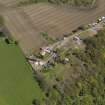
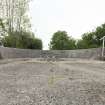
Oblique aerial view centred on the 6-inch gun battery emplacments with the 4.7-inch emplacements adjacent, taken from the SW.
View in Canmore
View in Canmore

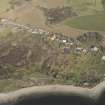
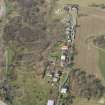
Oblique aerial view of Portkil Coastal Battery, looking N.
View in Canmore
View in Canmore

Interior of NW shell store. Detail of brackets.
View in Canmore
View in Canmore

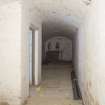
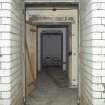
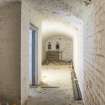
Interior. View entrance from exterior through to shifting lobby and then to magazine.
View in Canmore
View in Canmore

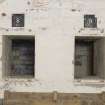
Interior of SE magazine. Detail of Nos. 8 and 9 light recesses.
View in Canmore
View in Canmore

View of Battery Observation Post from NE.
View in Canmore
View in Canmore

Detail of NW crew shelter chimmney. View from SW.
View in Canmore
View in Canmore

No. 2, 6-inch gun emplacement. SE platform. View from NW.
View in Canmore
View in Canmore

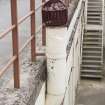
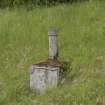
6-inch gun battery, Battery Observation Post. Detail of range finder pillar.
View in Canmore
View in Canmore

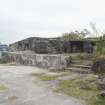
4.7in gun battery. General view from NW.
View in Canmore
View in Canmore

4.7in gun battery. View from N.
View in Canmore
View in Canmore

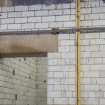
Engine House, engine room, interior. Detail of concrete lintel in the switch room.
View in Canmore
View in Canmore

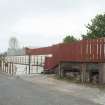
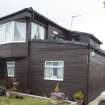
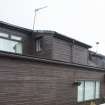
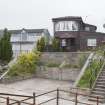
Engine House with modern house constructed on top. General view from east.
View in Canmore
View in Canmore

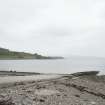
Jetty. View from W.
View in Canmore
View in Canmore

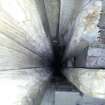
View down cartridge hoist shaft
View in Canmore
View in Canmore

Boundary stone No. 2
View in Canmore
View in Canmore

Oblique aerial view of Clyde defences, Portkil Battery centred on the 6-inch gun battery emplacments with the 4.7-inch emplacements adjacent, taken from the NNW.
View in Canmore
View in Canmore

Oblique aerial view centred on the 6-inch gun battery emplacments with the 4.7-inch emplacements adjacent, taken from the W.
View in Canmore
View in Canmore

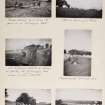
Six photographs showing daily activities at Kilcreggan Camp in 1902.
View in Canmore
View in Canmore

Oblique aerial view of Portkil Coastal Battery, looking NW.
View in Canmore
View in Canmore

No. 1, 6-inch gun emplacement. NW platform. Detail of cartridge hoist hatch.
View in Canmore
View in Canmore

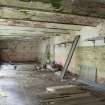
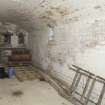
Interior of crew shelter.
View in Canmore
View in Canmore

Interior. Detail of barrel vaulted ceiling and brackets in crew shelter.
View in Canmore
View in Canmore

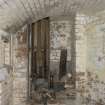
Interior of NW shell store. View of No. 1 gun cartridge hoist.
View in Canmore
View in Canmore

Interior of NW shell store. Detail of No. 1 gun cartridge hoist.
View in Canmore
View in Canmore

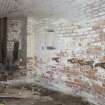
Interior of SE shell store looking towards entrance.
View in Canmore
View in Canmore

Interior of SE shell store looking towards entrance.
View in Canmore
View in Canmore

No. 2, 6-inch gun emplacement. SE platform. View from SE.
View in Canmore
View in Canmore

Fire Command Post. View from S.
View in Canmore
View in Canmore

Fire Command Post with original outshot on 1st floor. View from S.
View in Canmore
View in Canmore

Workshop. View from SE.
View in Canmore
View in Canmore

4.7in gun battery. Detail of ventilation pipe.
View in Canmore
View in Canmore

4.7in gun battery. Detail of railings.
View in Canmore
View in Canmore

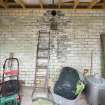
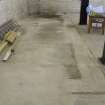
Workshop & store. Interior.
View in Canmore
View in Canmore

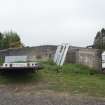
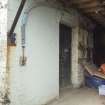
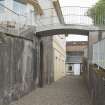
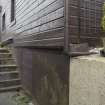
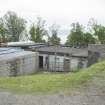
Access to Engine House, and workshop. View from SE.
View in Canmore
View in Canmore

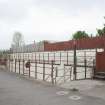
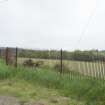
Detail of fencing. View from S.
View in Canmore
View in Canmore

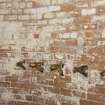
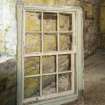
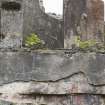
6-inch gun battery, interior of SE shell store. Detail of original sash and case window.
View in Canmore
View in Canmore

6-inch gun battery, interior of SE magazine. Detail of sliding door of issue hatch with nos. 8 and 9 light recesses above.
View in Canmore
View in Canmore

Boundary stone No. 1
View in Canmore
View in Canmore

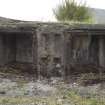
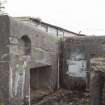
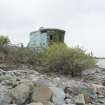
General view of blockhouse
View in Canmore
View in Canmore

Portkil site plan. For Interactive pdf, available to download, see WP 004488.
View in Canmore
View in Canmore

No.2, 6-inch gun emplacement. South east platform. View from NE.
View in Canmore
View in Canmore

No. 1, 6-inch gun emplacement. NW platform. View from N.
View in Canmore
View in Canmore

View of the raised Battery Observation Post, and the access down to the magazine and crew shelter, looking from NW.
View in Canmore
View in Canmore

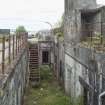
View of access stairways and magazine, store and crew shelter from NW.
View in Canmore
View in Canmore

No. 1, 6-inch gun emplacement. SE platform. Detail of lift shaft and hatch door. Written on the rear of the hatch door are the words 'CARTRIDGE SHAFT'.
View in Canmore
View in Canmore

Interior of crew shelter.
View in Canmore
View in Canmore

6-inch gun battery. View of stair and crew shelter from SE.
View in Canmore
View in Canmore

Interior of NW shell store. Detail of brackets.
View in Canmore
View in Canmore

Interior of NW shell store. Detail of No. 1 gun cartridge hoist.
View in Canmore
View in Canmore

Interior of NW magazine.
View in Canmore
View in Canmore

Interior of magazine.
View in Canmore
View in Canmore

Detail of SE crew shelter chimmney. View from S.
View in Canmore
View in Canmore

6-inch gun battery. Detail of cut metal brackets which once supported a metal stair and walkway to the Battery Observation post. View from NE.
View in Canmore
View in Canmore

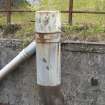
6-inch gun battery. Detail of ceramic ventilation pipe.
View in Canmore
View in Canmore

No. 2, 6-inch gun emplacement. SE platform. View from NE.
View in Canmore
View in Canmore

No. 2, 6-inch gun emplacement. SE platform. Detail of cartridge hoist shaft.
View in Canmore
View in Canmore

No. 2, 6-inch gun emplacement. SE platform. Detail of china fragment in wall.
View in Canmore
View in Canmore

Fire Command post. Detail of orginal stonework.
View in Canmore
View in Canmore

No. 2, 4.7in gun emplacement showing holdfast bolts. SE platform. Detail of curved glacis wall.
View in Canmore
View in Canmore

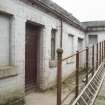
Caretakers quarters. View from SE.
View in Canmore
View in Canmore

Engine house accumulator store. General view.
View in Canmore
View in Canmore

Engine House, engine room, interior. View of barrel vaulted ceiling.
View in Canmore
View in Canmore

6-inch battery. Detail of water pipe.
View in Canmore
View in Canmore

6-inch gun battery. Detail of air brick.
View in Canmore
View in Canmore

Detail of boundary marker
View in Canmore
View in Canmore

Oblique aerial view centred on the 4.7-inch gun battery emplacements with the 6-inch gun emplacements adjacent, taken from the S.
View in Canmore
View in Canmore

No. 1, 6-inch gun emplacement. NW platform. View from N (with cartridge hoist hatch open.)
View in Canmore
View in Canmore

No. 1, 6-inch gun emplacement. NW platform. Detail of ammunition lockers.
View in Canmore
View in Canmore

No. 1, 6-inch gun emplacement. NW platform showing light recess, cartridge locker and hatch of the cartridge hoist. View from NW.
View in Canmore
View in Canmore

No. 1, 6-inch gun emplacement. NW gun platform and glacis with Fire Command Post and Battery Observation Post to rear. View from S.
View in Canmore
View in Canmore

Interior of crew shelter, detail of stove base.
View in Canmore
View in Canmore

Interior of crew shelter. Detail of windows.
View in Canmore
View in Canmore

Interior of NW shell store. View of No. 1 gun cartridge hoist and issue hatch.
View in Canmore
View in Canmore

Interior of shell store. Detail of signage above door to shifting lobby.
View in Canmore
View in Canmore

View of Battery Observation Post and telephone room from NE.
View in Canmore
View in Canmore

Battery Observation Post. Detail of cut metal brackets which once supported a metal walkway. View from NE.
View in Canmore
View in Canmore

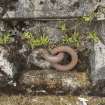
No. 2, 6-inch gun emplacement. SE platform. Detail of metal anchor loop on inside wall of glacis.
View in Canmore
View in Canmore

General view of Fire Command Post (on right) and Battery Observation Post (on left) from south.
View in Canmore
View in Canmore

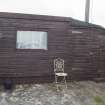
Fire Command post. View of shed from SW.
View in Canmore
View in Canmore

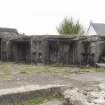
Cook house/ablution room/latrine. General view from NW.
View in Canmore
View in Canmore

Cook house. View from E.
View in Canmore
View in Canmore

Oil store. View from NE.
View in Canmore
View in Canmore

Engine House, engine room, interior. Detail of floor showing scars from the engines.
View in Canmore
View in Canmore

No. 4 searchlight.. General view from SW.
View in Canmore
View in Canmore

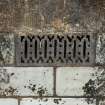
6-inch gun battery. Detail of ventilation grate below window.
View in Canmore
View in Canmore


You may copy, display, store and make derivative works for personal use or use solely within an educational institution by staff and students, under these conditions: the ScotlandsPlaces website is attributed, there is no commercial use or sale, and no public distribution (for example, by hand, email, or web). Full licence details.
Details
Organisation: Historic Environment Scotland (HES)
Alternative name(s): Fort Road
Canmore ID: 119886
Site type: Coastal Battery (20th Century), Coastal Battery (first World War)
County: Dunbartonshire
Parish: Rosneath
Council: Argyll And Bute