
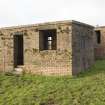
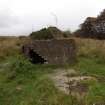
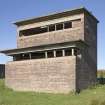
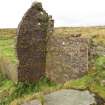
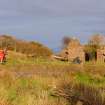
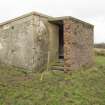
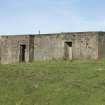
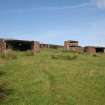
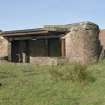
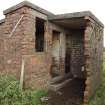
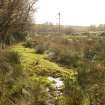
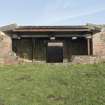
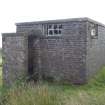
Toward Battery


Store, view from SE.
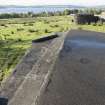
View in Canmore
View in Canmore

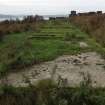
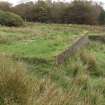
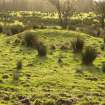
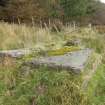
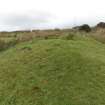
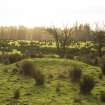
Earthworks to SE of B.O.P. representing remains of air raid shelter and/or machine-gun post, view from E.
View in Canmore
View in Canmore

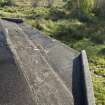
Gun emplacement no.2, detail of roof showing alteration to angle of canopy.
View in Canmore
View in Canmore

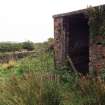
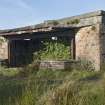
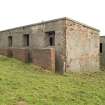
Store, view from S.
View in Canmore
View in Canmore

Gun emplacement no. 2, view from E.
View in Canmore
View in Canmore

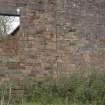
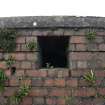
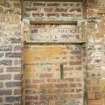
Gun emplacement no. 2, detail showing alteration to brickwork at E end.
View in Canmore
View in Canmore

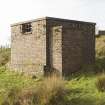
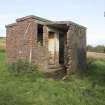
Duty shelter, view from SE.
View in Canmore
View in Canmore

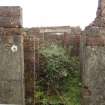
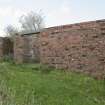
Detail of straight joint on building.
View in Canmore
View in Canmore

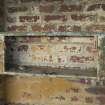
Battery Observation Post, ground floor room, detail of shelving in wall recess.
View in Canmore
View in Canmore

View of remains of boiler house.
View in Canmore
View in Canmore

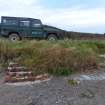
Garage and static tank, view from N.
View in Canmore
View in Canmore

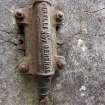
Detail of cable-head bearing the legend ‘Pirelli No. 367 General’ – a product of the Pirelli-General Cable Company Ltd, Southampton.
View in Canmore
View in Canmore

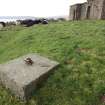
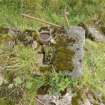
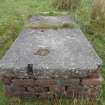
Concrete block at the SE corner of the signalling station mast base, view from SE.
View in Canmore
View in Canmore

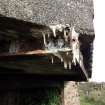
Stalactites forming beneath concrete roof of gun emplacement.
View in Canmore
View in Canmore

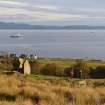
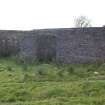
General view of the NAFFI building with views over to Bute, from N.
View in Canmore
View in Canmore

Remains of no.1 searchlight, view from SW.
View in Canmore
View in Canmore

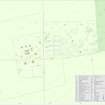
Toward site plan. See Interactive Map at Canmore Document WP004480.
View in Canmore
View in Canmore

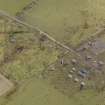
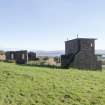
Oblique aerial view centred on the coastal battery with the accommodation camp adjacent, taken from the SE.
View in Canmore
View in Canmore

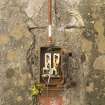
Magazine store, detail of switch box on outside wall.
View in Canmore
View in Canmore

Coal store, view from E.
View in Canmore
View in Canmore

NAAFI, view from W.
View in Canmore
View in Canmore

Gun emplacements nos. 1 and 2, view from SE.
View in Canmore
View in Canmore

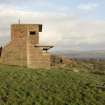
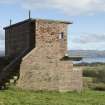
Battery Observation Post, view from SE.
View in Canmore
View in Canmore

Duty and reserve shelters, view from SE.
View in Canmore
View in Canmore

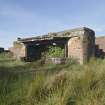
Machine-gun post, view from SW.
View in Canmore
View in Canmore

Concrete floor of abultions room and drying room, view from ENE.
View in Canmore
View in Canmore

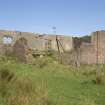
Western compartments of building, view from NW.
View in Canmore
View in Canmore

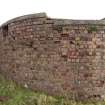
Curving eastern wall of the western nissen hut that served as a NAFFI building, view from SE.
View in Canmore
View in Canmore

Detail exterior view of eastermost window in north wall of crew shelter.
View in Canmore
View in Canmore

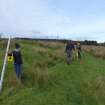
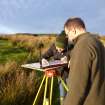
Alan Kilpatrick and students from the Centre for Battlefield Archaeology, University of Glasgow, surveying the P.A.D trench.
View in Canmore
View in Canmore

Plane table survey of P.A.D. shelter
View in Canmore
View in Canmore

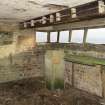
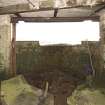
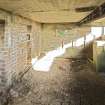
Gun emplacement, inside of front wall, view from NW.
View in Canmore
View in Canmore

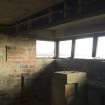
Battery Observation Post, 1st floor room, view from W.
View in Canmore
View in Canmore

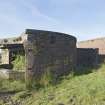
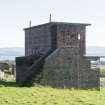
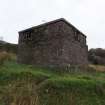
Battery observation post, view from SW.
View in Canmore
View in Canmore

Gun emplacement no.2, view from SE.
View in Canmore
View in Canmore

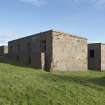
Magazine stores, view from SE.
View in Canmore
View in Canmore

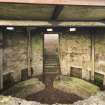
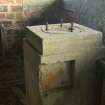
Battery Observation Post, ground floor room, view showing rangefinder plinth.
View in Canmore
View in Canmore

NAFFI quarters, view from SW.
View in Canmore
View in Canmore

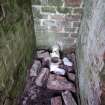
Toilet cubicle.
View in Canmore
View in Canmore

Detail of roof extension and butt jointed brickwork, on W side of gun house.
View in Canmore
View in Canmore

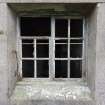
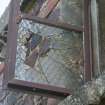
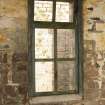
Detail of window with wire mesh reinforced pane.
View in Canmore
View in Canmore

HES archaeologist John Sherriff taking measurements of the NAFFI building.
View in Canmore
View in Canmore

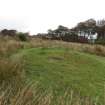
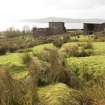
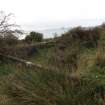
General view of passive air defence trenches from NE.
View in Canmore
View in Canmore

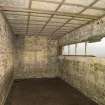
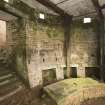
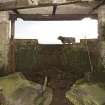
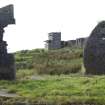
Gun emplacement, view of interior from SW.
View in Canmore
View in Canmore

Battery Observation Post, ground floor room, view showing rangefinder plinth and bench.
View in Canmore
View in Canmore

Battery Observation Post, ground floor room, detail of mounting bolts on top of rangefinder plinth.
View in Canmore
View in Canmore

Store, detail of inside of window frame.
View in Canmore
View in Canmore

Duty shelter, view from SE.
View in Canmore
View in Canmore

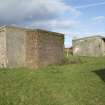
Reserve shelter, store and toilet block, view from SE.
View in Canmore
View in Canmore

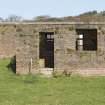
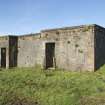
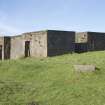
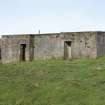
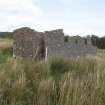
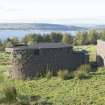
Building, view from E.
View in Canmore
View in Canmore

Magazine stores, view from SW.
View in Canmore
View in Canmore

Interior view of toilet block, view from SW.
View in Canmore
View in Canmore

Building, view from E.
View in Canmore
View in Canmore

Gun emplacement, view of interior from N.
View in Canmore
View in Canmore

Gun emplacement, view of interior from N.
View in Canmore
View in Canmore

Gun emplacement, view of interior from S.
View in Canmore
View in Canmore

Magazine store, view from SW.
View in Canmore
View in Canmore

Machine-gun post, view from NE.
View in Canmore
View in Canmore

Duty shelter, view from SE.
View in Canmore
View in Canmore

Gun emplacement no.2, detail of roof showing alteration to angle of canopy.
View in Canmore
View in Canmore

Gun emplacements nos. 1 and 2, view from SE.
View in Canmore
View in Canmore

Battery Observation Post, view from NW.
View in Canmore
View in Canmore

W.C. view from SW.
View in Canmore
View in Canmore

No. 2 gun emplacement, view from W.
View in Canmore
View in Canmore

Toilet cubicle in south east corner of ATS Quarters.
View in Canmore
View in Canmore

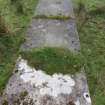
Concrete raft/floor of ATS mess, view from N.
View in Canmore
View in Canmore

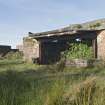
Garage, view from NE.
View in Canmore
View in Canmore

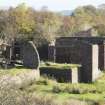
General view of gun emplacements, from SW.
View in Canmore
View in Canmore

Remains of no.1 searchlight, view from S.
View in Canmore
View in Canmore

Oblique aerial view centred on the coastal battery with the accommodation camp adjacent, taken from the NW.
View in Canmore
View in Canmore

Battery observation post and mast base with eyelet, view from W.
View in Canmore
View in Canmore

Gun emplacement no.1, view from SE.
View in Canmore
View in Canmore

Gun emplacement no.1, view from roof of gun emplacement no.2 to E.
View in Canmore
View in Canmore

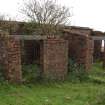
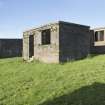
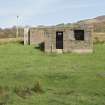
Building to north east of Battery Observation Post, view from SW.
View in Canmore
View in Canmore

Remains of ATS hut, view from SW.
View in Canmore
View in Canmore

Concrete raft/floor of ATS mess.
View in Canmore
View in Canmore

Machine-gun post. View from SSE.
View in Canmore
View in Canmore

Static tank, view from NE.
View in Canmore
View in Canmore

Toilet block, view from SW.
View in Canmore
View in Canmore

Detail of vent.
View in Canmore
View in Canmore

Detail of corroding steel beam.
View in Canmore
View in Canmore

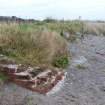
Ditch at east end of site, part of air raid shelter and/or machine-gun post, view from N.
View in Canmore
View in Canmore

Duty and reserve shelters, view from NW.
View in Canmore
View in Canmore

Machine-gun post, view from NE.
View in Canmore
View in Canmore

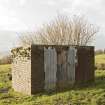
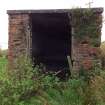
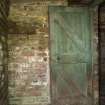
Magazine store, view of entrance showing original door.
View in Canmore
View in Canmore

Gun emplacement no.1, view from S.
View in Canmore
View in Canmore

Mast base fixings with store behind, view from S.
View in Canmore
View in Canmore

Gun emplacement no.2, detail of roof showing alteration to angle of canopy.
View in Canmore
View in Canmore

Building to NE of the Battery Observation Post, view from S.
View in Canmore
View in Canmore

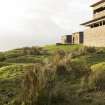
Store and Battery Observation Post, general view from W.
View in Canmore
View in Canmore

Building, view from N.
View in Canmore
View in Canmore

Building, view from NE.
View in Canmore
View in Canmore

Battery Observation Post, view from NAAFI to E.
View in Canmore
View in Canmore

Battery Observation Post, view from NW.
View in Canmore
View in Canmore

W.C. view from SW.
View in Canmore
View in Canmore

Reserve and duty shelters, view from NW.
View in Canmore
View in Canmore

Battery Observation Post, ground floor room, view showing rangefinder plinth and remains of furnishings.
View in Canmore
View in Canmore

Battery Observation Post, ground floor room, detail of recess in north wall.
View in Canmore
View in Canmore

Battery Observation Post, ground floor room, detail of mounting bolts on top of rangefinder plinth.
View in Canmore
View in Canmore

Building, view from SE.
View in Canmore
View in Canmore


You may copy, display, store and make derivative works for personal use or use solely within an educational institution by staff and students, under these conditions: the ScotlandsPlaces website is attributed, there is no commercial use or sale, and no public distribution (for example, by hand, email, or web). Full licence details.
Details
Organisation: Historic Environment Scotland (HES)
Alternative name(s): Clyde Defences; Toward Point Coastal Battery
Canmore ID: 106361
Site type: Coastal Battery (second World War)
County: Argyll
Parish: Dunoon And Kilmun
Council: Argyll And Bute